Discover the easiest way to install garage door weather stripping. Follow our complete walkthrough for a tighter, energy-efficient garage door seal.
Garage door weather stripping is a quick DIY project that helps seal out cold air, bugs, and dust. It also reduces energy bills. Most homeowners can complete the task in under an hour. For improved comfort and savings, this is a straightforward upgrade.
To start, clean the door edges and measure carefully. Cut the material to fit, then attach it with screws or adhesive. Make sure it seals tightly with no gaps. If you’re wondering how to install garage door weather stripping, follow these steps for a secure fit and better insulation.

What Is Garage Door Weather Stripping
Garage door weather stripping is a flexible seal added to the edges of your garage door to block out wind, rain, bugs, and dust. It helps keep the garage dry, warm, and clean by sealing the small gaps around the door when it’s closed.
1. Types of Garage Door Weather Stripping
- Bottom Seal: Seals the gap at the bottom of the door to block water, dirt, and pests.
- Side Seals: Installed on both sides to stop drafts and keep out dust and bugs.
- Top Seal: Placed at the top to block wind, rain, and improve insulation.
- Thresholds: Mounted on the floor to create a tight seal, ideal for sloped or uneven surfaces.
2. Why It Matters
Garage door weather stripping matters because it prevents outside air from entering and stops warm or cool air from escaping. It also blocks rain, dirt, and bugs from entering. Most importantly, it helps lower energy bills by keeping your garage better sealed.
Simple Tools for Installing Garage Door Weather Stripping
Installing the proper seal helps keep out drafts, dust, and pests. With the right tools and steps, you can easily learn how to install garage door weather stripping at home using the list below:
- Weather stripping kit: Includes bottom, top, or side seals based on your needs.
- Utility knife or scissors: To trim the strip to fit your door.
- Screwdriver or drill: Helps secure the stripping in place.
- Measuring tape: Ensures accurate sizing for a snug fit.
- Adhesive or sealant: Useful if the stripping doesn’t have a sticky side.
- Heat gun (optional): Helps shape or seal vinyl strips better.
- Cleaning supplies: Wipe down the surface before attaching the new strip.
How to Install Garage Door Weather Stripping
Installing garage door weather stripping keeps out wind, bugs, and rain. It also helps your garage stay warmer in winter and cooler in summer. Follow these easy steps to do it yourself and see how to install garage door weather stripping the simple way.
Step 1: Remove Old Weather Stripping
Carefully remove the old weather stripping using a flathead screwdriver or a pry bar. Remove any leftover glue or dirt with a scraper. Clean the surface using mild soap and water. Let it dry completely before you start installing the new weather stripping.
Step 2: Measure Your Garage Door
Use a tape measure to get the length of the top, bottom, and both sides of the garage door. Write down each measurement. Getting the right size is important for a good seal, so double-check before cutting the new weather stripping.
Step 3: Cut and Fit the New Weather Stripping
Take your measurements and cut the new weather stripping using strong scissors or a utility knife. Place each piece where it belongs to ensure it fits properly. Make small trims if needed so each strip lines up and fits tightly.
Step 4: Attach the Stripping
If the stripping has sticky backing, peel and press it firmly onto the surface. For nail-on or screw-on types, use a drill or hammer to attach them. Press down as you go to keep it straight and make sure it sticks well.
Step 5: Check for Proper Seal and Alignment
Close the new garage door and look for any gaps or light coming through the edges. Feel for any drafts. If something feels off, adjust the weather stripping by shifting or tightening it until it seals the door fully and evenly.
What Are The Pro Tips for a Weather-Tight Seal
Installing garage door weather stripping the right way makes a big difference. These simple pro tips will help you get a tight seal that blocks wind, water, and bugs for good.
Install in Mild Weather for Best Results
Apply weather stripping when the weather is neither too hot nor too cold. Around 50°F to 70°F is best. This helps the strip stay soft and stick better. Cold makes it hard, and heat can weaken the glue.
Don’t Over tighten Screws
When using screws, don’t make them too tight. Tight screws can bend the strip or crack the surface. Just make them tight enough to hold the strip in place. A snug fit works better and helps the strip seal the door properly.
Use Silicone Sealant for Extra Protection
Use a thin line of silicone sealant where you see small gaps or corners. This helps block air, bugs, and water. The sealant also helps hold the strip in place longer and makes the seal stronger, especially in tricky spots.
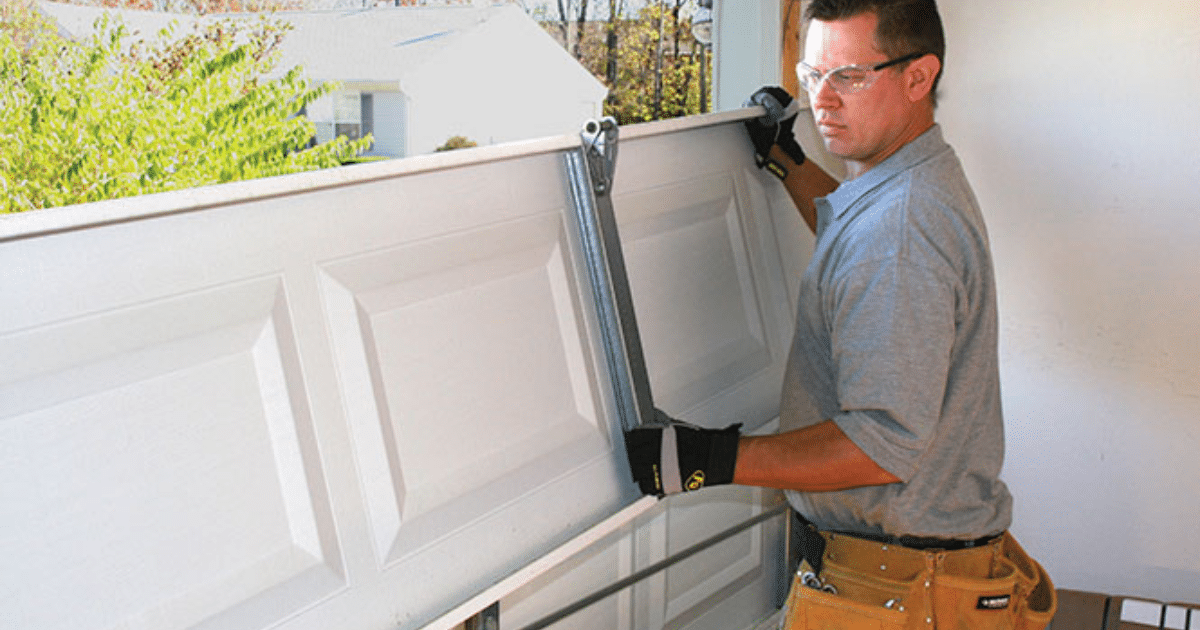
Replace Damaged Panels Before Sealing
Check your garage door before adding the strip. If any panels are bent or broken, fix them first. A smooth surface helps the strip stick better. Cracks can let in air or water, so it’s best to call a professional garage door repair service if you need help.
What to Avoid When You Install Garage Door Weather Stripping
Garage door weather stripping helps block wind, water, and pests while saving energy. To get the best results, learn how to install garage door weather stripping correctly and avoid these common mistakes during the process.
1. Overstretching the Seal
Pulling the weather stripping too tightly can cause it to peel off over time. This reduces its ability to block air and moisture. Gently press the seal in place without stretching it to keep it secure and effective.
2. Installing on a Dirty or Uneven Surface
A dusty or rough surface prevents the seal from sticking well. Clean and smooth the area before placing the weather stripping. A clean surface helps the seal stick better and last longer.
3. Choosing the Wrong Type of Weather Stripping
Different garage doors need different seals. Using the wrong kind can leave gaps or wear out quickly. Always choose the correct type and size that fits your door before starting the installation.
4. Skipping the Threshold Seal (If Applicable)
Threshold seals help keep water, dust, and bugs from entering under the door. If your garage often gets wet, skipping this step can lead to problems. Add a threshold seal when needed for stronger protection.
When to Call a Garage Door Pro
If your garage door looks uneven, doesn’t close all the way, or moves off track, it’s best to call a pro. These problems can get worse over time. A garage door repair service can quickly check and fix the problem.
You should also get help if the door panels or tracks are bent or broken. This can prevent the door from functioning correctly. If you add new weather stripping and it still won’t seal, a professional like All About Doors in Glen Burnie can determine the cause and make the necessary repairs.
Maintenance Tips to Extend the Life of Your Weather Stripping
Garage door weather stripping helps block wind, bugs, and moisture. To make it last longer, you need to take care of it regularly. Here are simple tips you can follow at home.
Clean Quarterly
Wipe the weather stripping every three months with a damp cloth and mild soap. This removes dirt and debris that can wear it down and stop it from sealing properly.
Check for Cracks or Tears
Look closely for any signs of damage, like cracks or small tears. Damaged weather stripping cannot seal properly and may let in water, air, or pests.
Replace Every 2–3 Years
Even with good care, seals wear out. It’s best to replace your weather stripping every 2 to 3 years to keep your garage protected and energy bills low.
Re-Seal with Adhesive as Needed
If a strip comes loose but is still in good condition, apply strong adhesive to reattach it to its original position. This minor fix helps extend its life without needing a full replacement.

FAQs About Installing Garage Door Weather Stripping
What is the best material for garage door seals?
The best material for garage door seals depends on your local weather conditions and the frequency of door use. Rubber is strong and lasts long in rough weather. Vinyl is softer and cheaper. Many people choose rubber for better sealing and longer life.
Can I install weather stripping without removing the garage door?
Yes, you can add weather stripping without removing the garage door. Most seals go on the bottom, sides, or top of the door. You can use screws or strong glue. Simply clean the surface and follow the correct installation steps.
Do I need to replace the bottom seal if only one side is leaking?
If one side of the new garage door bottom seal is leaking, it’s still best to replace the whole seal. A small leak can worsen and allow bugs or water to enter. A new seal provides better protection and helps keep your garage warmer.
Is threshold weather stripping necessary for all garages?
Not every garage requires threshold weather stripping, but it can be helpful if your floor is uneven or if water seeps in. It keeps out rain, dirt, and bugs. It’s a smart add-on for garages in rainy areas or with sloped driveways.
Conclusion
If you want a warmer garage, lower energy bills, and fewer bugs sneaking in, sealing your garage door is a smart move. A simple fix, such as weather stripping, can improve comfort and help you save money year-round.
This guide explained how to install garage door weather stripping in clear, simple steps. With a few tools and some time, your garage can stay sealed and energy-efficient. If other issues arise, a garage door repair may also be necessary to keep everything functioning correctly.
All About Doors provides expert service, quality materials, and dependable support. Call 410-590-5662 for quick and reliable help. Get your garage sealed tight and protected in every season.
End Note
All About Doors proudly offers trusted garage door repair and installation services across Maryland. We serve homes in Glen Burnie and Anne Arundel County with fast, dependable solutions. Visit our website to explore how we can help with your garage door needs.
We provide top-quality products like LiftMaster garage door openers and trusted models from CHI Overhead Doors. Take a look at our real customer projects in the gallery or visit our showroom to see our products up close before making your decision.
Learn more about our team on the About Us page. Get quick answers in our FAQs, stay updated through our blog, and connect with us on Facebook. For service, quotes, or support, visit our contact page.