Opening your garage by hand can be difficult, especially during rain or late at night. A garage door opener makes things easier. It helps you open and close your garage with just a click, saving time and effort every day.
However, installing it correctly is important. You need the right tools, a bit of time, and careful steps. If it’s not done properly, the opener might not work well or could even damage your garage door.
This guide will show you the safe way of attaching a garage door opener to door setups. We’ll go over the tools, steps, and tips to help your opener run smoothly and keep your garage door functioning for a long time.

Read more to learn the steps for safely attaching a garage door opener to your door. Follow our simple guide to complete the job correctly without stress or guesswork.
Why Proper Installation Matters
The garage door opener helps your door open and close. If it’s not attached the right way, the door can get off track, wear out fast, or stop working properly.
A bad setup can damage the motor and cause safety issues. Learning the right way of attaching a garage door opener to your door keeps everything safe and working correctly.
When installed correctly, your opener will:
- Operate quietly and smoothly
- Prevent unnecessary wear on springs and rollers
- Enhance security and reduce the risks of accidents
- Extend the lifespan of the entire garage door system
Garage Door Opener Parts Explained for Homeowners
Before starting, it’s smart to understand the key components of your system. A standard setup includes the motor, rail, trolley, drive mechanism, safety sensors, and a wall control switch for daily use.
Attached to the top of the door is a sturdy bracket. This piece connects the opener arm to the door, letting it move smoothly. Without this connection, the system wouldn’t be able to open or close the door correctly.
Each part must work in sync to ensure proper function. If something is misaligned or out of place, the opener may struggle, stop, or become a safety concern during use.
Tools Needed for Garage Door Opener Setup
Gather all your tools before you begin. Most installations require:
- A power drill with various bits
- Adjustable wrench and socket set
- Screwdrivers (Phillips and flathead)
- Measuring tape and level
- Step ladder
- Safety glasses and gloves
- Mounting brackets and hardware (usually included with the opener)
How to Prepare Your Garage Door Before Attaching the Opener
Before attaching the opener, make sure your garage door is in good condition. A faulty or unbalanced door can strain the opener and lead to premature failure. Here’s how to check:
- Disconnect the door from any existing opener if you’re replacing one.
- Manually open and close the door to ensure it moves smoothly without sticking.
- Inspect the springs, rollers, and tracks for signs of wear or damage. Replace any broken parts.
- Balance the door by lifting it halfway; it should stay in place without falling or rising If it doesn’t, call a professional to adjust the springs.
Skipping these checks might lead to problems later, even if the opener is correctly installed.
Step 1: Mount the Opener Motor
Choose a solid spot above the garage door to install the motor. Use a tape measure to find the center and mark it. Mount the motor to a ceiling joist using the provided brackets for strong support and balance.
Make sure the motor is level so it works smoothly. For garages with low ceilings, use hanging straps or extension brackets. The opener should be high enough to let your car pass underneath without hitting the unit.
Step 2: Assemble and Install the Rail
Attach the rail to the motor following the instructions in your manual. The rail guides the trolley, which moves the door. Slide the trolley onto the rail before locking it in. This lets the door open and close properly.
Secure the front of the rail above the door with a header bracket. Use a level to keep it straight. If the rail isn’t aligned, the opener might strain, causing it to wear out or jam over time.
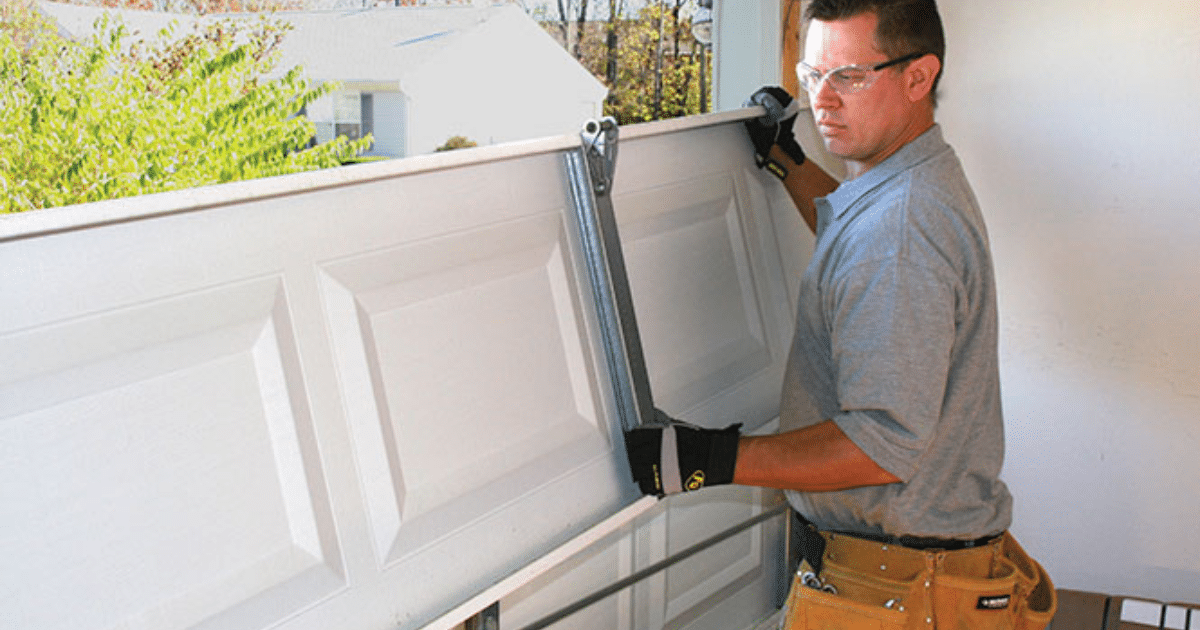
Step 3: Attach the Opener Arm to the Door
Attaching a garage door opener to the door is an important step. Start by mounting the door bracket to the top center panel of the garage door. Use the provided lag screws and pre-drill holes for wooden doors to prevent splitting.
Connect the curved and straight arms between the trolley and the door bracket. Make sure the arms stay straight when the door is closed. Tighten everything securely. Misaligned arms can strain the motor and affect smooth door movement.
Step 4: Install Safety Sensors and Wall Controls
Mount the safety sensors six inches above the floor, one on each side of the garage door. Align them carefully, using the small lights on each unit to ensure they face each other and work correctly.
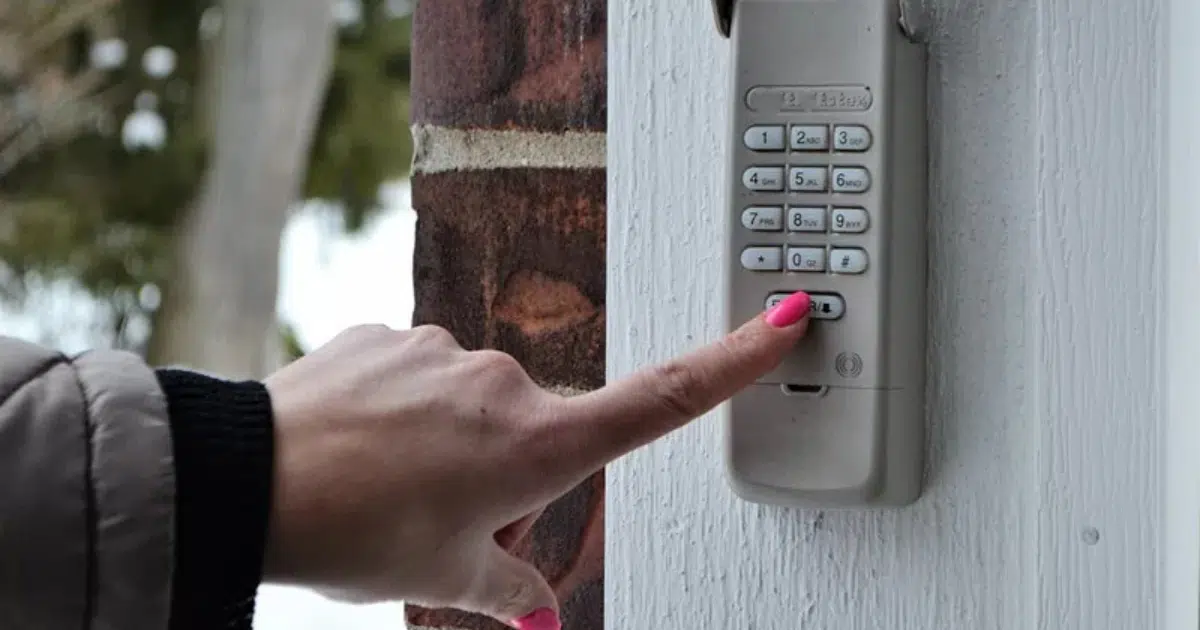
Now, mount the wall control panel inside your garage. Place it near the interior door so it’s easily accessible to adults but out of reach for children. This lets you open and close the door with a single press.
Step 5: Connect the Power and Test the System
Plug the motor into a grounded outlet. Don’t use an extension cord. If you don’t have an outlet nearby, call a licensed electrician. Set the travel and force limits according to the manual to ensure the system operates safely.
Open and close the door several times to test it. Watch for smooth motion and listen for odd sounds. If needed, make small adjustments. This helps ensure your garage door opener works correctly and remains safe for everyday use.
Safety Tips When Installing a Garage Door Opener
Attaching a garage door opener to the door involves handling heavy parts and electrical components, so safety should be your top priority. Keep these tips in mind:
1. Wear Safety Glasses and Gloves
Always wear safety glasses and gloves when working on your garage door. They help protect your hands and eyes from sharp edges, falling parts, or sudden movements during repairs.
2. Don’t Adjust Torsion Springs
Never attempt to adjust torsion springs on your own. These springs are tightly wound and can snap with force, causing serious injury. Leave this dangerous task to trained garage door professionals.
3. Keep the Ladder Stable
Use a strong, stable ladder when working overhead. Make sure it’s placed on a flat surface and avoid leaning too far. Staying balanced helps prevent falls and keeps the job safe.
4. Check All Fasteners
Before finishing, double-check all bolts, nuts, and screws. Ensure everything is tight and secure to ensure your garage door opener operates safely and remains secure over time.
How to Fix Issues When Installing an Opener to a Garage Door

Even after a careful installation, you may encounter a few issues. Here are some quick fixes:
1. Door Doesn’t Close Fully
Adjust the opener’s down travel limit if the garage door doesn’t close completely. This helps seal the bottom, keeping out water, bugs, and cold air.
2. Opener Strains or Makes Noise
If the opener makes noise or strains, check the door balance and tighten all bolts. Apply garage door lubricant to moving parts to reduce friction and enhance performance.
3. Safety Sensors Don’t Work
Clean both sensor lenses and remove anything blocking them. Make sure they face each other and are lined up correctly so the garage door works safely and won’t reverse unexpectedly.
4. Remote Doesn’t Respond
Replace the batteries if the garage door remote isn’t working. If that doesn’t help, reprogram the remote to reconnect it with the opener for smooth operation.
Tips to Keep Your Garage Door Opener Working Well
A well-maintained opener not only lasts longer but also operates more quietly and safely. Make it a habit to:
- Check and tighten all hardware every few months.
- Lubricate the rail, rollers, and hinges regularly.
- Test the safety reversal system by placing a small object in the door’s path; the door should reverse immediately upon contact.
- Replace remote batteries annually to avoid sudden failures.
By taking care of your garage door opener, you’ll prevent costly repairs and extend the life of your entire system.
When to Call a Garage Door Opener Professional
While many homeowners can handle installing a garage door opener the
- The ceiling structure can’t support the motor unit securely.
- You’re uncomfortable working with electrical wiring.
- The door requires spring adjustment or track realignment.
Professional installers possess the necessary tools and expertise to handle complex installations safely and efficiently.
Conclusion
Say goodbye to lifting heavy garage doors and enjoy smooth, easy use every day. Attaching the garage door opener to the door setups the right way makes life safer and more comfortable for your home and family. No more daily struggle.
Our team provides you with simple, trusted garage door repair services and opener installations. We ensure everything works correctly from the start. Whether it’s a new install or fixing a mistake, we handle it with care.
Let our pros take care of the job so you don’t have to worry. Call (410) 590-5662 now to book your service. With All About Doors’ help, your garage door opener will work smoothly and last a long time.
Frequently Asked Questions
How Do You Reattach a Garage Door to the Opener?
To reattach a garage door to the opener, pull the emergency release toward the door, then manually lift the door until the carriage clicks back into place. This reconnects the opener and allows it to control the door as usual again.
How Do I Secure My Garage Door Opener?
To secure your garage door opener, change the access codes regularly, enable rolling-code features, and lock the emergency release with a zip tie or shield. You should also avoid leaving remotes in cars and always keep the opener’s wiring properly protected.
Where Should a Garage Door Opener Be Mounted?
A garage door opener should be mounted on the ceiling near the center of the garage door. It must be aligned with the door’s track and have strong support brackets attached to the ceiling joists to handle the unit’s weight and operation.
What Is the Best Angle to Connect a Garage Door Opener to a Door?
The best angle to connect a garage door opener to a door is typically 90 degrees when closed, forming a straight line. Use angled arm brackets if necessary, and ensure the force is distributed evenly to ensure safe and smooth door movement.
End Note
When attaching a garage door opener to a door, it must be done correctly to avoid damage and keep everything working safely. All About Doors offers trusted service to make sure your opener is installed correctly and securely.
We also install strong Industrial Railings in Glen Burnie, MD, that improve safety for homes and businesses. Whether you need help with garage door openers or new railing systems, our team provides expert work with lasting results you can rely on.
To schedule service, simply visit our Contact Page. Stay informed with tips and updates by following us on Facebook. For easy directions, find us on Google Maps. We’re ready to help with attaching garage door openers and more.
All About Doors
120 N Langley Rd, Glen Burnie, MD 21060, United States
+14102165824