With our expert guide, learn how to replace garage door springs safely. Discover costs, safety tips, and when to call a professional!
A broken garage door spring can disrupt your daily routine and create safety risks. Springs are the key part that lifts and lowers your garage door smoothly. When they fail, you need to act fast. This expert guide explains the process, provides safety tips, and explains how to change garage door springs correctly.
Garage door spring replacement means removing the damaged spring and installing a new one to keep the door working well. There are two types: torsion springs above the door and extension springs on the sides. Both help lift the door and must be set with proper tension to ensure safe and smooth operation.
How Garage Door Springs Work and Why They Matter
Before attempting the repair or replacement, it’s important to understand the function and types of garage door springs. Most residential garage doors use either torsion or extension springs.
1. Torsion Springs
Torsion springs sit above the garage door and twist to store energy when the door moves. As they unwind, they help lift or lower the door smoothly. These springs last longer, offer better control, and are generally safer than other spring types.
2. Extension Springs
Extension springs are on both sides of the new garage door and stretch to create tension when the door is in use. They assist in lifting, but don’t last as long. While more affordable, they can be risky if they snap without safety cables.
Signs Your Garage Door Springs Need Replacing
Garage door springs don’t last forever. Here are some signs that yours may be at the end of its lifespan:
- The garage door doesn’t open fully or gets stuck halfway.
- The door opens very slowly or closes too quickly.
- You hear a loud snap or pop from the garage area.
- The garage door feels unusually heavy when trying to lift it manually.
- Visible gaps or stretched coils in the springs.

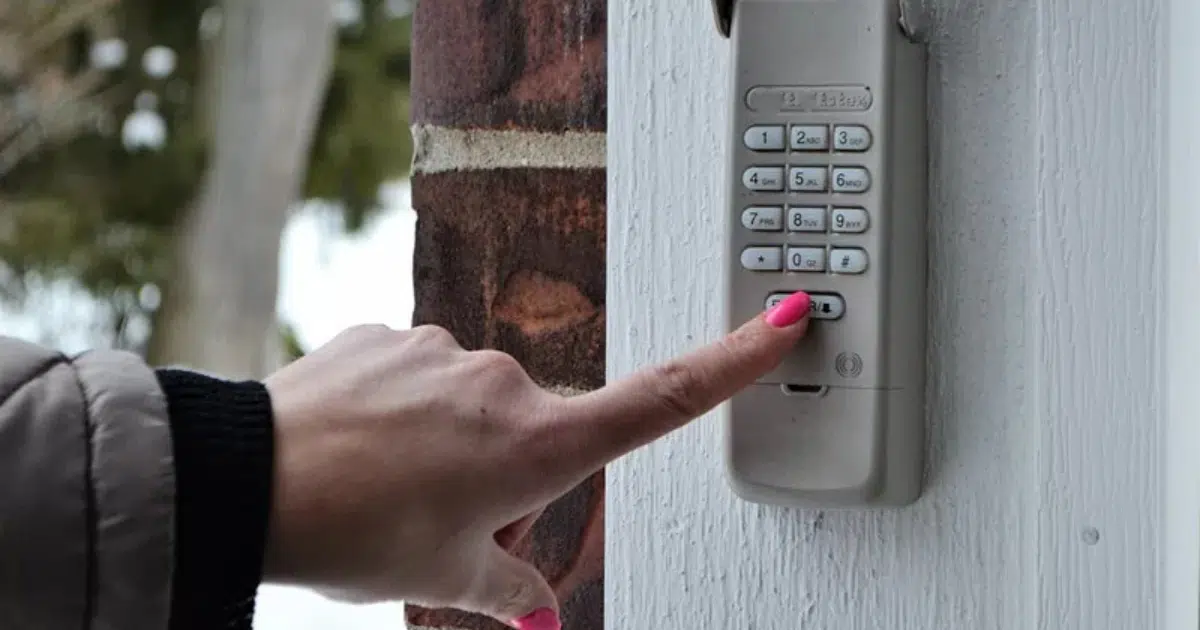
Is It Safe to Replace Garage Door Springs Yourself
Many homeowners ask, “Can I replace garage door springs myself?” It’s possible, but the springs are under strong tension. One mistake can hurt you badly. Always know the risks before trying garage door spring replacement.
Torsion spring replacement requires special tools and safety gear. It’s not an easy job. If you’re not sure what to do, call a garage door expert like All About Doors for help.
If you still want to do it yourself, learn each step carefully. Use the right tools, follow safety tips, and be extra careful. Garage door spring replacement must be done safely.
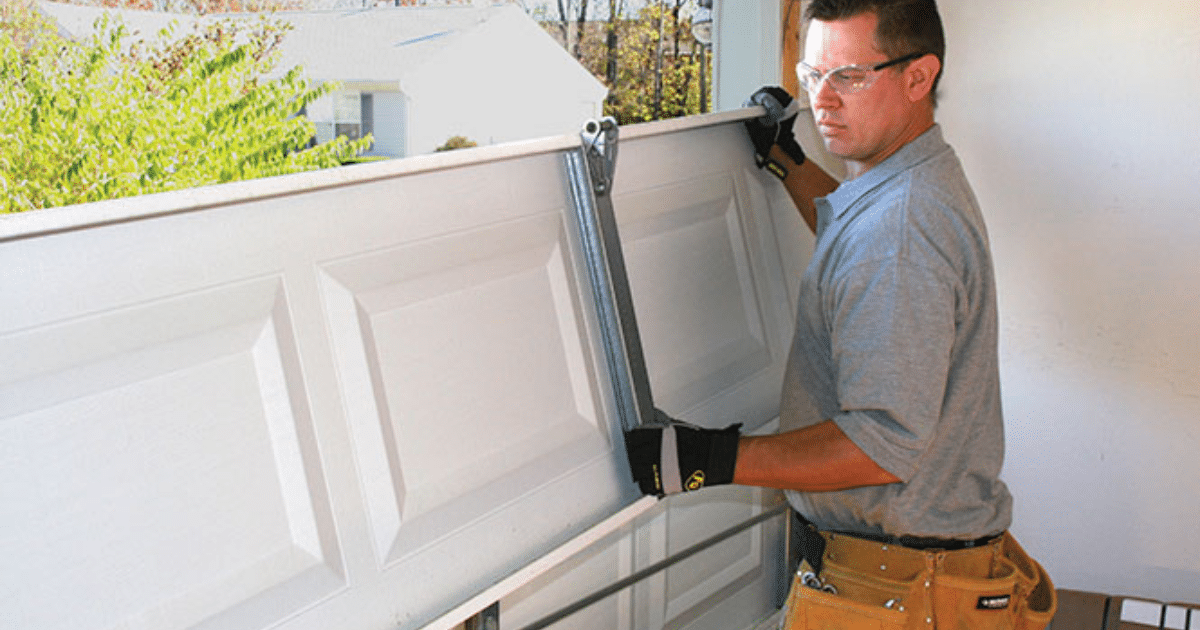
Steps on How to Change Garage Door Springs
If you’ve decided to go the DIY route, here’s a general overview of how to change garage door springs. This is specifically for torsion springs, which are more common in modern garage door systems.
Step 1: Disconnect the Garage Door Opener
Unplug the garage door opener before doing anything. This stops the motor from turning on while you work. It’s a simple way to stay safe and avoid accidents while fixing the door.
Step 2: Secure the Door
Use locking pliers or clamps to hold the tracks just above the rollers. This prevents the door from moving or falling while you work, and it’s an important safety step to prevent injuries.
Step 3: Unwind the Broken Spring
Use two winding bars to carefully unwind the broken spring. Do not use a screwdriver, as it can slip. Keep a firm grip and stay alert, as the springs are under a lot of tension.
Step 4: Loosen the Set Screws
Once the spring is fully unwound, use a wrench to loosen the set screws. Remove the old spring and slide the torsion bar out from the brackets. Be gentle to avoid damage to other parts.
Step 5: Install the New Spring
Slide the new spring onto the bar. Make sure it goes on the correct side and faces the right way. A wrong setup can cause the door to work incorrectly or become unsafe.
Step 6: Reattach Cables and Center Bearing
Hook the lift cables back into place and check that they’re tight in the drums. Also, make sure the center bearing is set correctly and secure. This keeps everything steady and working right.
Step 7: Wind the New Spring
Turn the spring using winding bars. A 7-foot door usually needs 30 quarter turns. Go slowly and carefully to avoid mistakes. Double-check your work before moving to the next step.
Step 8: Tighten Screws and Test
Tighten the set screws to hold the spring in place. Take off the clamps, then lift the door by hand to check if it moves smoothly. Plug in the opener and test the door with the remote.
Should You Fix Your Garage Door Springs or Call a Pro
Knowing how to change garage door springs doesn’t always mean you should do it. Here’s a quick comparison between going pro and doing it yourself:
- DIY Pros: Potential cost savings on labor; educational experience; convenient if you already have the tools.
- DIY Cons: High risk of injury; time-consuming; might void warranties; possible future issues if installed incorrectly.
- Professional Pros: Expertise, speed, and safety; work often backed by warranty; less stress and mess.
- Professional Cons: Higher upfront cost.
Garage Door Spring Repair Costs Explained
Now that you understand how to change garage door springs, let’s talk money. The cost of replacement can vary widely based on several factors:
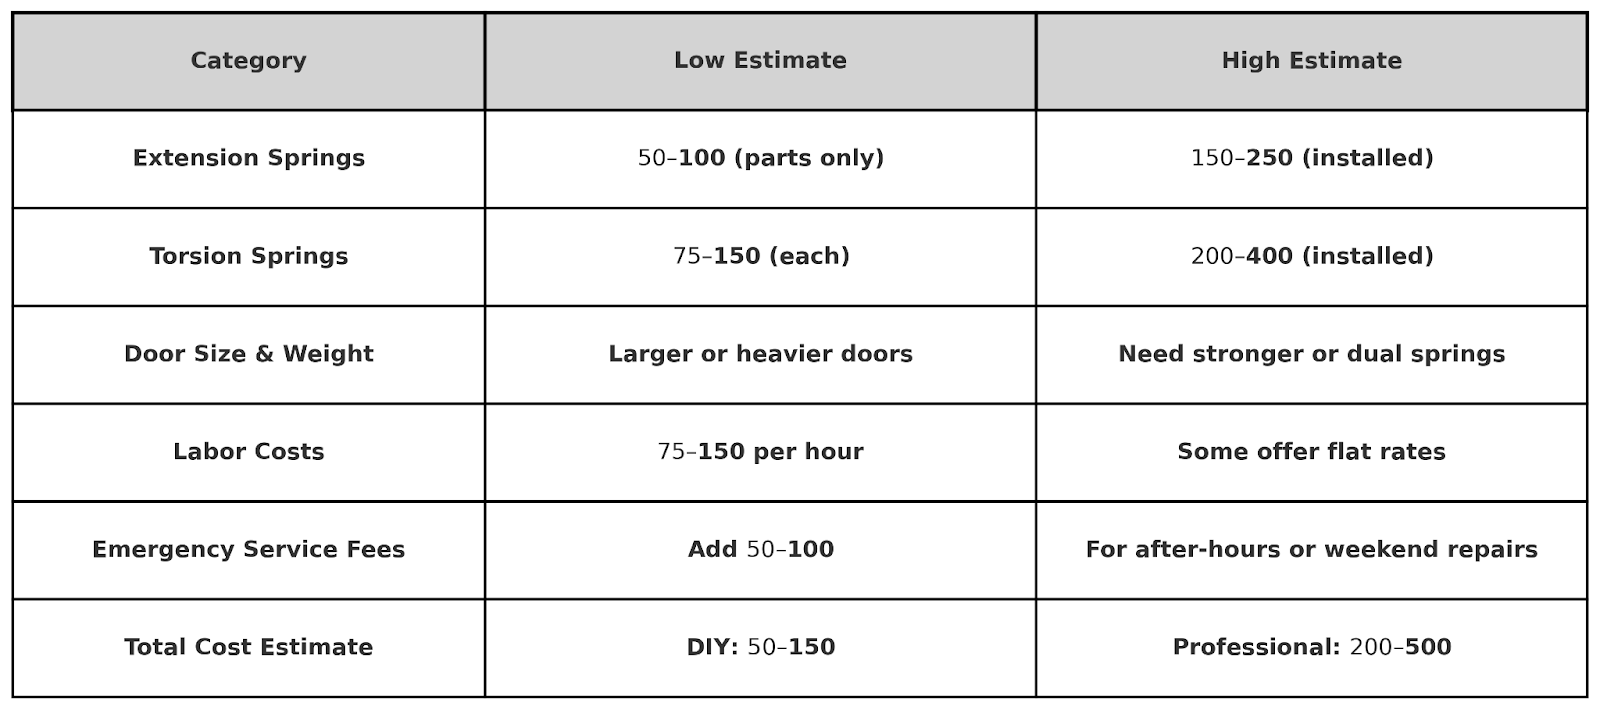
Most garage doors use two springs. If one breaks, it’s best to replace both for balance. Contact All About Doors today to book an appointment and get a quick quote for your garage door repair.
How Long Do Garage Door Springs Last
The average lifespan of a garage door spring depends on its cycle rating. One cycle is one full opening and closing of the door.
1. Standard Springs
Standard springs can open and close your garage door about 10,000 times. This usually lasts 7 to 10 years for most homes. They cost less but wear out faster, especially if you use the door frequently.
2. High-Cycle Springs
High-cycle springs work for 20,000 to 50,000 open-and-close cycles. They are suitable for homes where the garage door is used a lot. These springs cost more at first but last longer, so you won’t need to replace them as often.
How to Maintain Garage Door Springs After Replacement
Once you’ve mastered how to change garage door springs or had a professional do it, ongoing care is essential. Here’s how to keep things running smoothly:
1. Lubricate the Springs Regularly
Spray garage door springs with silicone spray every 3 to 6 months. This helps stop rust and keeps the door moving quietly and smoothly. Don’t use grease because it collects dirt. Lubricating often makes the springs last longer, allowing the door to work better.
2. Check Cables, Pulleys, and Rollers
Look at the cables, pulleys, and rollers to see if they are rusty, worn, or broken. These parts help lift the door and can wear out over time. Replace anything that looks damaged to stop bigger problems and keep the garage door working safely.
3. Test the Door Balance
Pull the red cord to disconnect the opener. Lift the door by hand to about halfway. If it stays still, it’s balanced. The springs may be too tight or loose if they move up or down. Ask a garage door repair expert for help if needed.

Frequently Asked Questions
How do I tell which garage door spring I need?
To determine which garage door spring you need, check the size and type of your door. Some doors use springs above, and others use springs on the sides. A garage door expert can examine your door and help you choose the right spring.
Can I lift a garage door with a broken spring?
No, you should not try to lift a garage door with a broken spring. The spring helps carry the door’s weight. Without it, the door is too heavy and could fall. Stop using it and call a garage door repair expert.
Where are the springs located on a garage door?
Garage door springs are found above the door or along the sides. Torsion springs sit on a metal bar above the door, and extension springs are on both sides of the tracks. These springs help the garage door open and close more easily.
Which way to tension a garage door spring?
To tighten a garage door spring, turn it upward in the right direction based on which side it’s on. This job is dangerous and should only be done by a trained expert. Garage door springs can snap if handled the wrong way.
Conclusion
When your garage door spring breaks, it can disrupt your day and pose a safety problem. It is very important to fix it fast and correctly. This guide helps you understand the steps, stay safe, and know when to ask for help from a trusted expert.
Knowing how to change garage door springs is useful, but not always easy. If done wrong, it can be risky. It’s better to call a pro who can fix it safely. With the right garage door repair services, your door will work better and last longer.
All About Doors offers safe and affordable spring replacement. Whether you need a torsion spring or an extension spring fixed, we’re ready to help. Call us now at (410) 590-5662. We also help install new garage doors so your garage stays safe and works smoothly.
End Note
All About Doors is your trusted local expert for everything garage doors. Visit our homepage to explore complete services, including top brands like BMP Doors for modern, durable solutions. We proudly offer professional garage door repair in Glen Burnie, MD, for smooth, safe performance.
We install reliable LiftMaster openers for easy, everyday use. Learn more about us and check out reviews from satisfied customers. For fast and friendly garage door repair in Anne Arundel County, MD, our skilled team is always ready to help keep your door working right.
See real results in our gallery and get expert tips from our blog. Visit our showroom, follow us on Facebook, or contact us for reliable garage door services. We deliver simple, lasting solutions that fit your home and budget.
All About Doors
120 N Langley Rd, Glen Burnie, MD 21060, United States
+14105905662